Zendesk Integration
Link Zendesk support tickets to RMAs and view return details directly from Zendesk.
The Zendesk integration connects ReturnMate with your Zendesk Support instance, allowing you to link support tickets to RMAs and view return information directly from the Zendesk agent interface.
Features
Ticket Linking
- Link existing tickets to RMAs from the RMA detail page
- Create new tickets directly from ReturnMate
- Search tickets by customer email to find related conversations
- Bi-directional sync - notes and status updates sync between systems
Sidebar App
Install the ReturnMate sidebar app in Zendesk to view:
- RMA number and status
- Order details and customer information
- Return reason and warranty status
- Quick link to open the full RMA in ReturnMate
Automatic Sync
When a ticket is linked to an RMA:
- Status changes automatically post to Zendesk as internal notes
- Notes added in ReturnMate can sync to the linked ticket
- Zendesk comments appear in the RMA timeline
- Timeline filter shows all Zendesk messages
Setup Guide
Step 1: Enable Zendesk Integration
- Go to Settings → Integrations in ReturnMate
- Find the Zendesk section
- Check Enable Zendesk integration
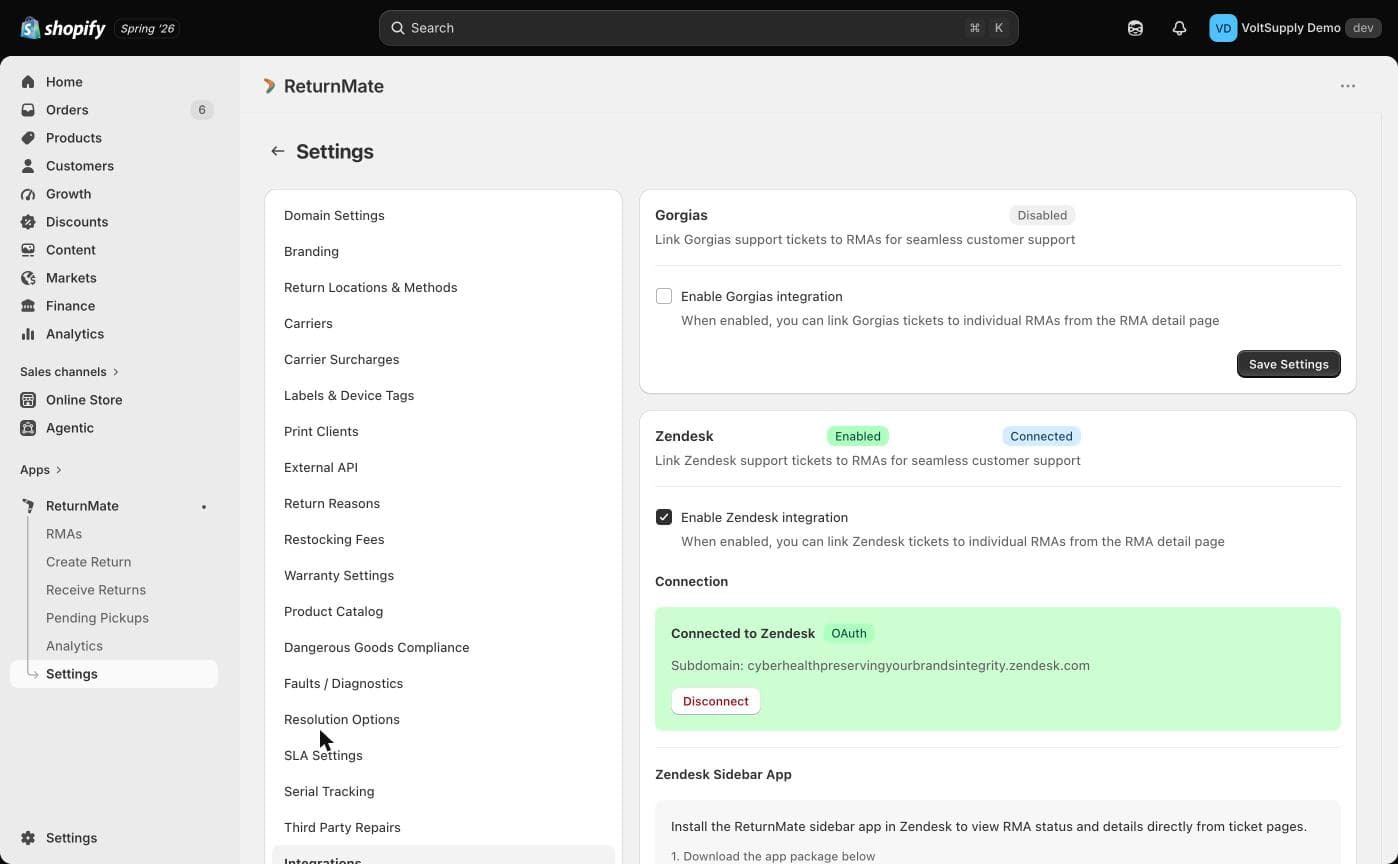
Step 2: Connect Your Zendesk Account
You can connect using OAuth (recommended) or an API token.
Option A: OAuth Connection (Recommended)
- Enter your Zendesk subdomain (e.g.,
yourcompanyfrom yourcompany.zendesk.com) - Click Connect with OAuth
- Authorize ReturnMate in the Zendesk popup
- You'll see "Connected to Zendesk" when successful
Option B: API Token
- Check Use API token instead
- Enter your Zendesk subdomain
- Enter your admin email address
- Get an API token from Zendesk Admin Center → APIs → Zendesk API
- Click Connect with API Token
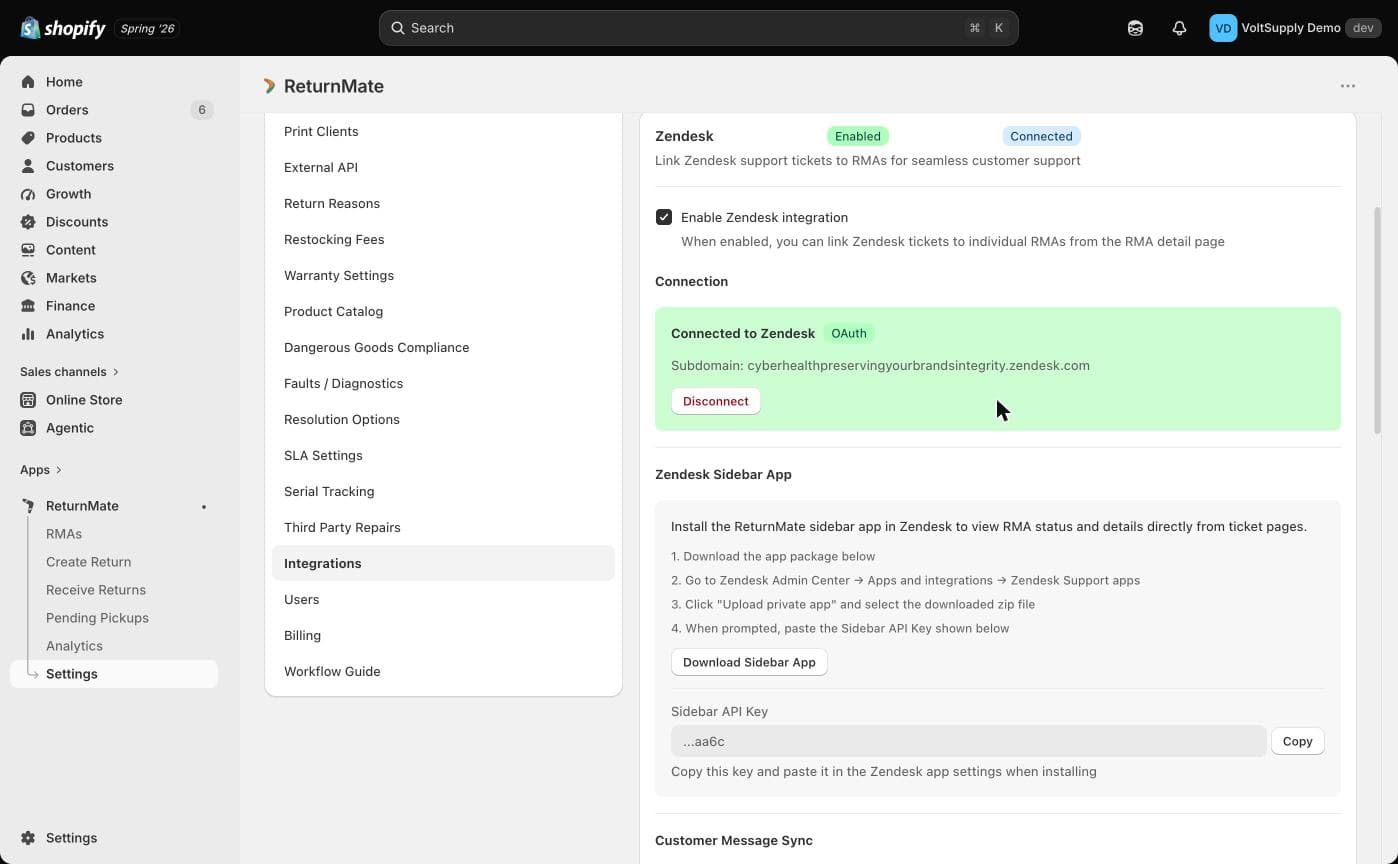
Step 3: Install the Sidebar App
The sidebar app lets agents view RMA details directly in Zendesk tickets.
Download and Install
- In ReturnMate, go to Settings → Integrations → Zendesk
- Click Download Sidebar App to get the zip file
- Copy the Sidebar API Key shown below the download button (you'll need this in step 8)
- Open Zendesk Admin Center
- Navigate to Apps and integrations → Zendesk Support apps
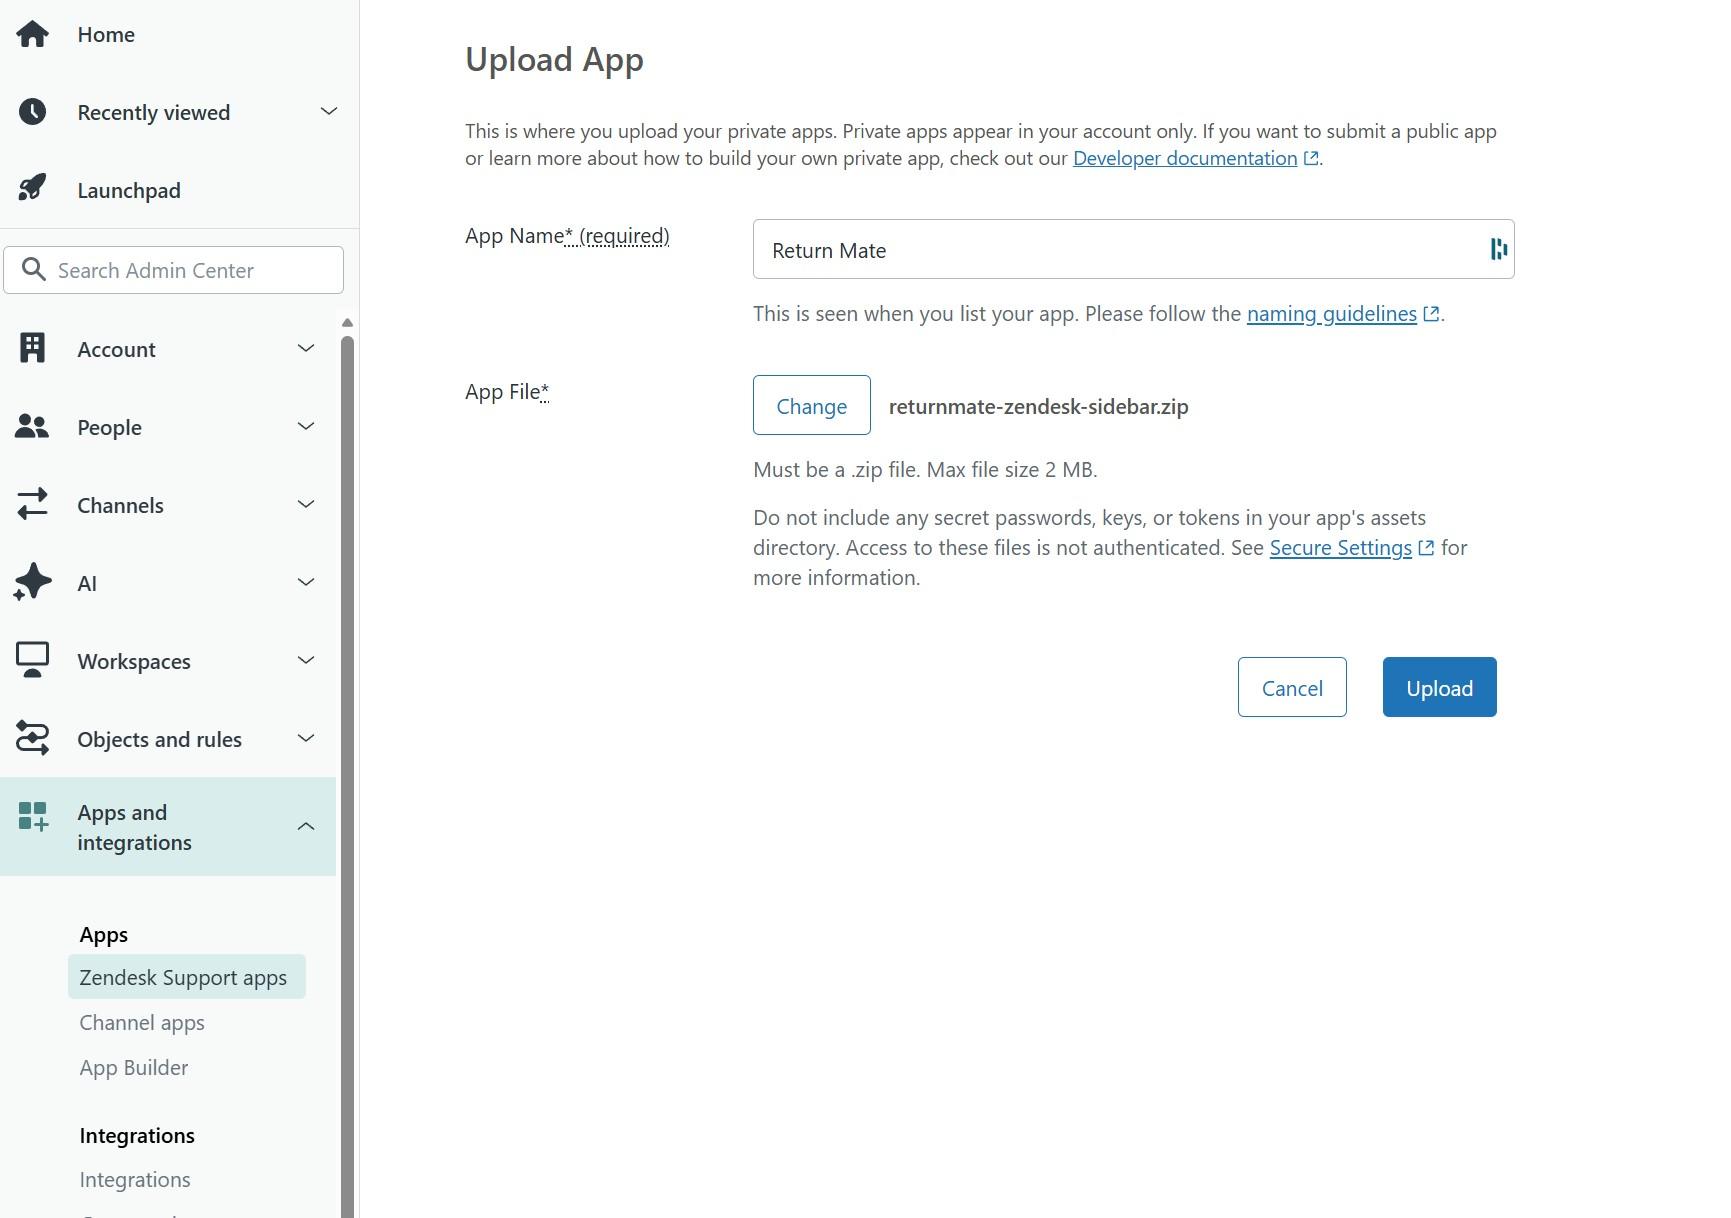
- Click Upload private app
- Enter "ReturnMate" as the app name
- Select the downloaded zip file
- Click Upload
Configure the API Key
After uploading, you'll be prompted to configure the app settings:
- Leave API URL and Admin URL as the defaults
- Paste your Sidebar API Key (copied from ReturnMate in step 3)
- Click Install
The API key securely authenticates the sidebar app with ReturnMate. Each ReturnMate account has a unique key.
After installation, the ReturnMate sidebar will appear when viewing tickets that are linked to RMAs.
Using the Integration
Linking a Ticket to an RMA
- Open an RMA in ReturnMate
- Find the Support Ticket section
- Click Link Existing Ticket or Create New Ticket
- Select from tickets matching the customer's email, or enter a ticket ID manually
- Click Link Ticket
Once linked:
- The ticket URL appears in ReturnMate
- The RMA summary is posted to the Zendesk ticket
- Future status changes sync automatically
Viewing RMA Details in Zendesk
When viewing a ticket linked to an RMA:
- Look for the ReturnMate sidebar app
- View the RMA status, order number, and customer details
- Click Open in ReturnMate to see the full RMA
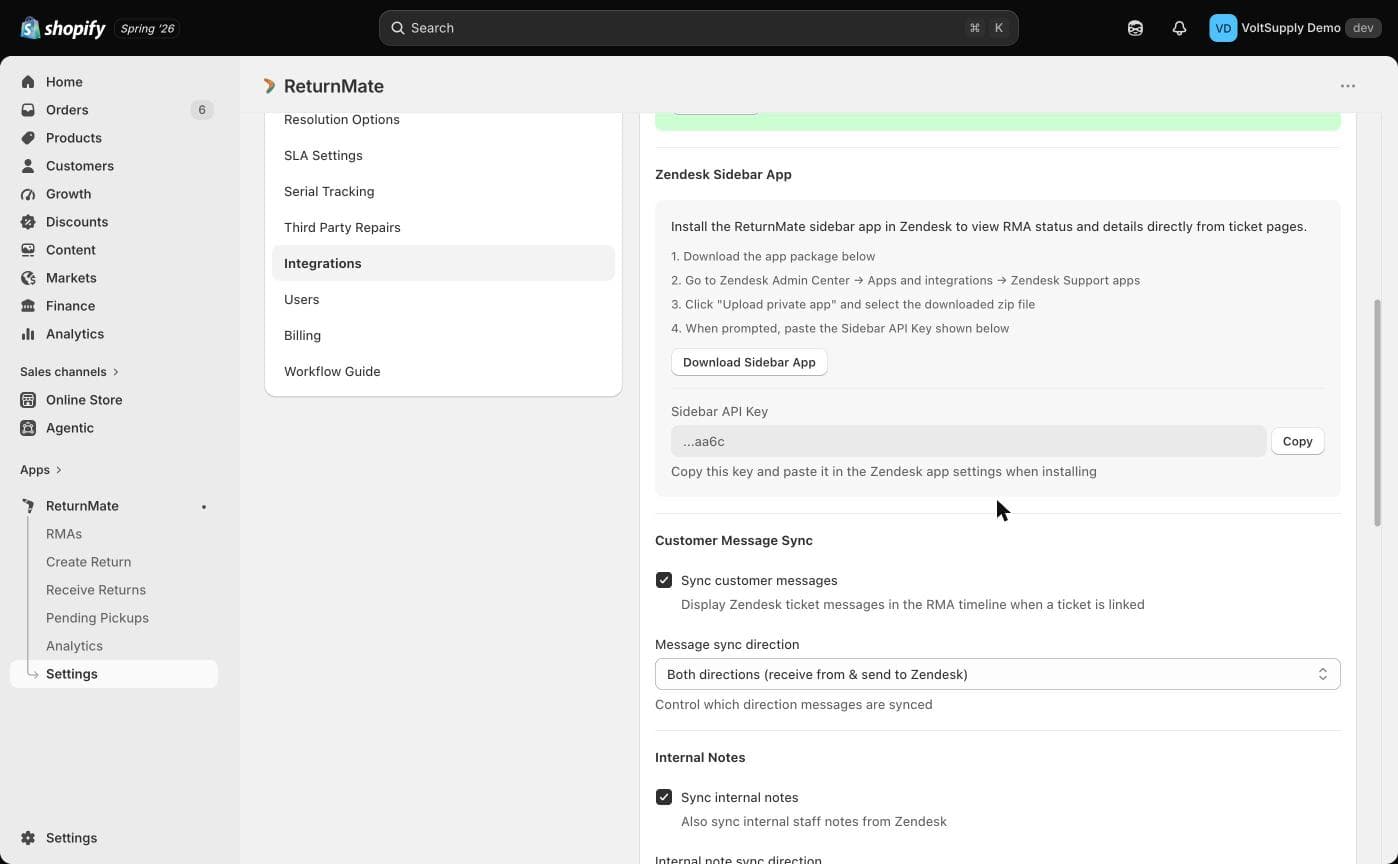
Syncing Notes
When adding a note in ReturnMate:
- Check Zendesk under "Sync to Support Tickets"
- The note will be added to the linked Zendesk ticket
- By default, notes sync automatically when a ticket is linked
Timeline Filtering
View Zendesk messages in the RMA timeline:
- Open the RMA detail page
- Go to the Activity Timeline section
- Click the Zendesk filter tab to see only Zendesk messages
- Messages show "Agent Reply" or "Customer Message" badges
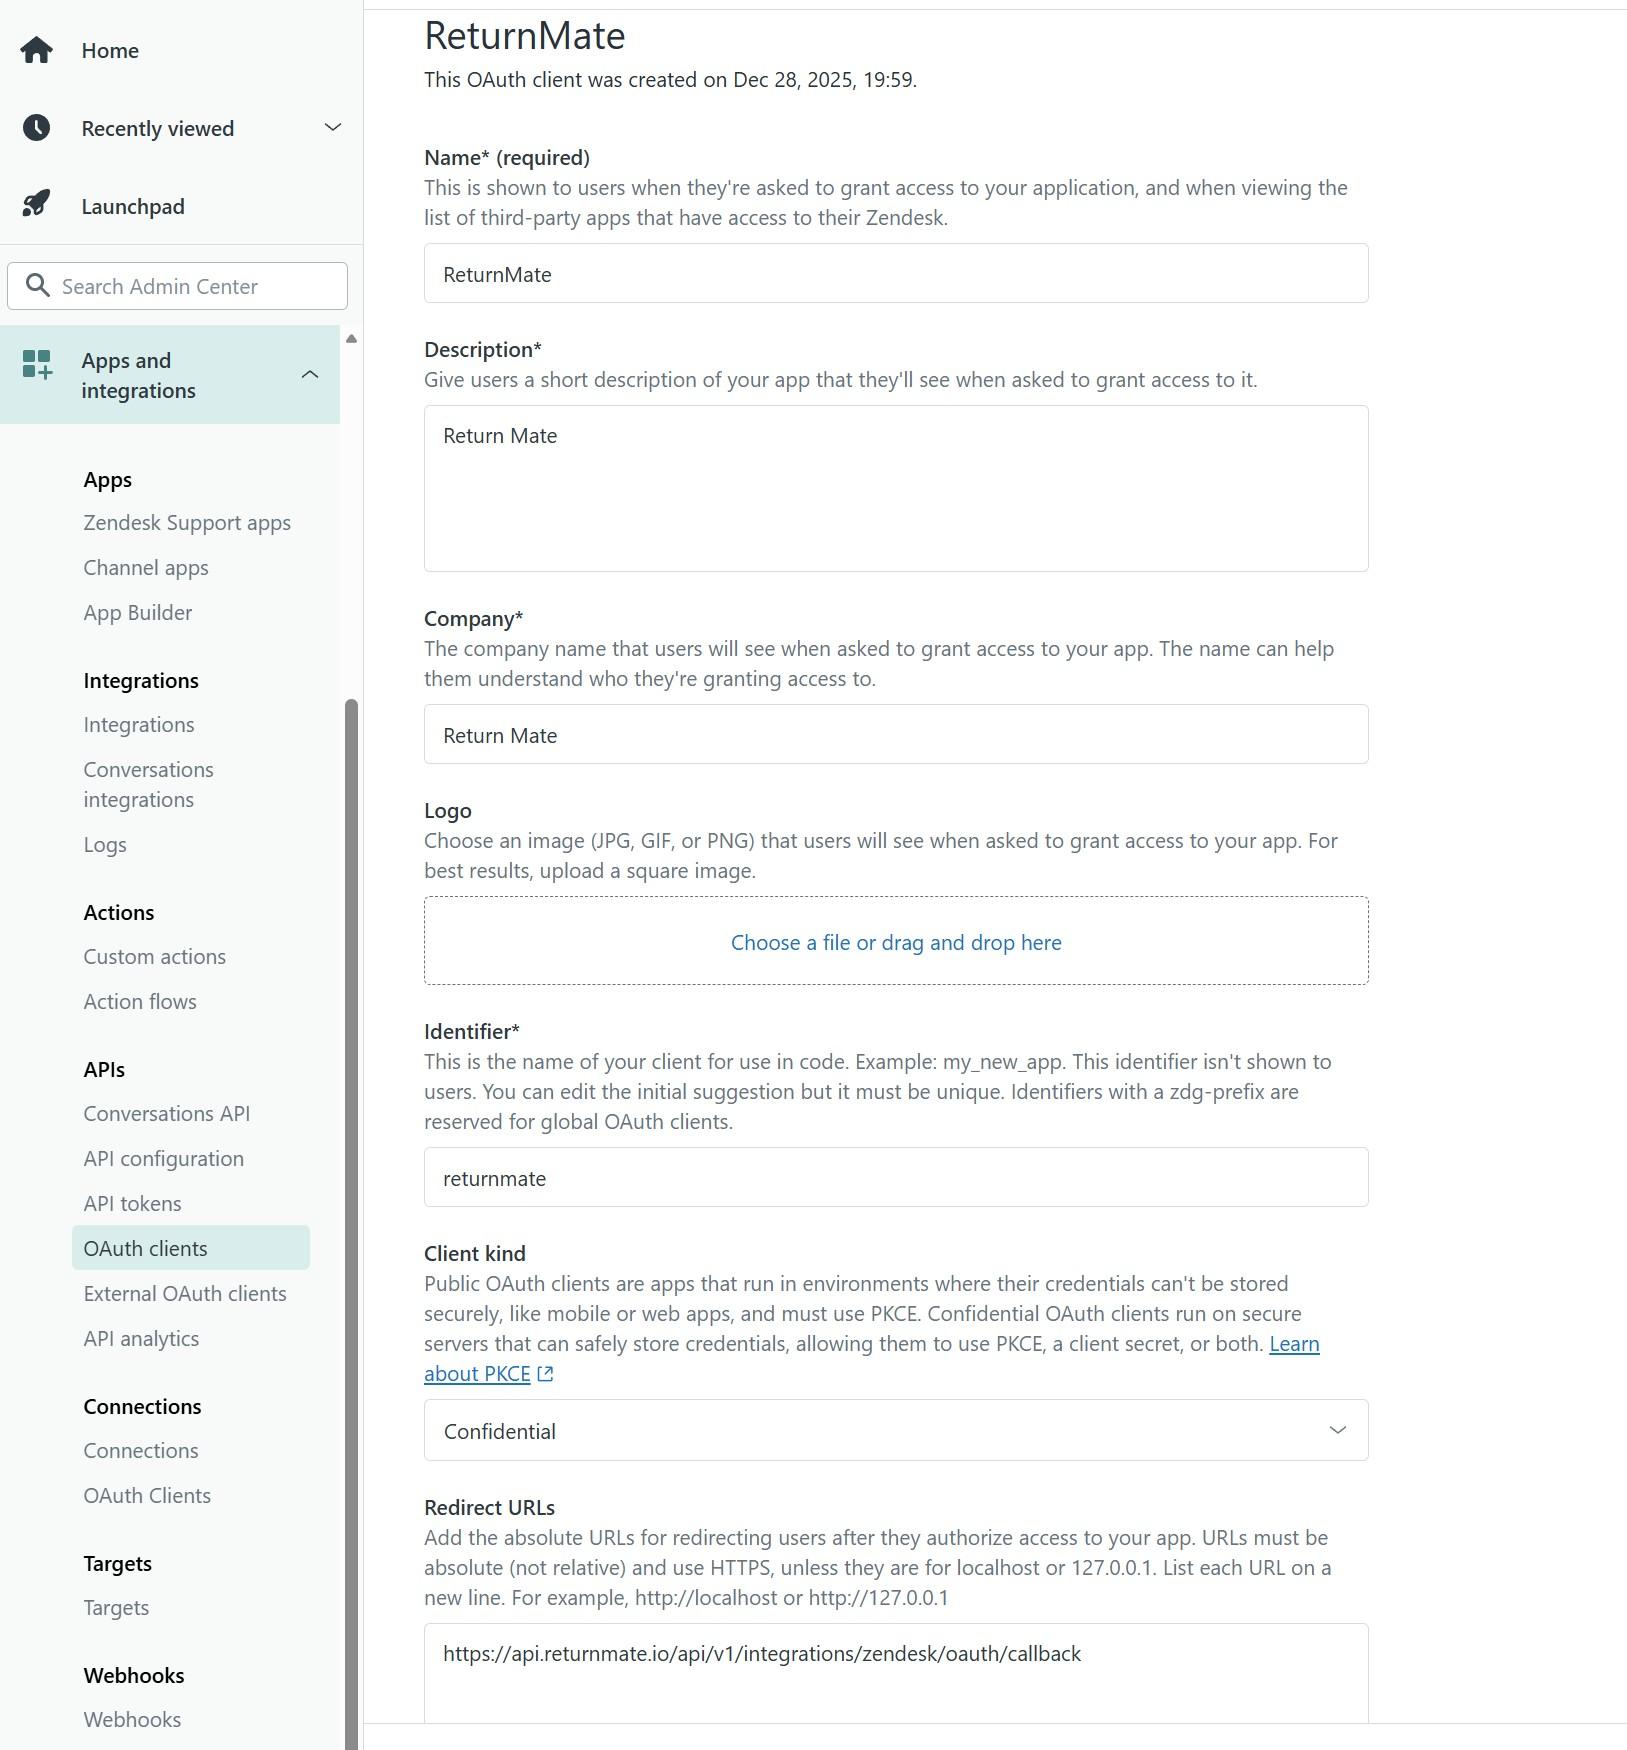
Advanced: OAuth Client Setup
If you need to set up OAuth manually (for custom deployments):
- Go to Zendesk Admin Center
- Navigate to Apps and integrations → APIs → OAuth clients
- Create a new OAuth client with:
- Name: ReturnMate
- Identifier: returnmate
- Client kind: Confidential
- Redirect URL:
https://api.returnmate.io/api/v1/integrations/zendesk/oauth/callback
Troubleshooting
"Failed to connect to Zendesk"
- Verify your subdomain is correct
- Ensure you have admin access to Zendesk
- Check that third-party app access is enabled in Zendesk
Sidebar app not showing
- Verify the app is installed in Zendesk Admin Center
- Check that the ticket is linked to an RMA
- Refresh the ticket page
Sidebar shows "Authentication failed"
- Go to Zendesk Admin Center → Apps and integrations → Zendesk Support apps
- Click on the ReturnMate app, then Change settings
- Verify the Sidebar API Key matches the key shown in ReturnMate Settings → Integrations → Zendesk
- If keys don't match, copy the correct key from ReturnMate and update the app settings
Notes not syncing
- Ensure the ticket is linked to the RMA
- Check that "Sync to Support Tickets" is enabled
- Verify the Zendesk connection is active