Warranty Case Lifecycle
Understand the complete warranty claim process from submission to resolution.
ReturnMate manages the complete warranty claim lifecycle — from customer submission through diagnostics, fault code assignment, repair or replacement, and return to customer. It includes serial number verification, three-level fault classification tied to suppliers, repair quote workflows with payment via Shopify draft-order invoice, technician assignment with labour tracking, and configurable warranty policies by product, SKU, tag, or collection.
Warranty vs Standard Returns
Warranty claims differ from standard returns:
| Aspect | Standard Return | Warranty Claim |
|---|---|---|
| Time Window | Change-of-mind window set on the return reason | Warranty period from your warranty policies |
| Reason | Customer preference | Product defect/failure |
| Evidence | Receipt/order | Fault description, photos, serial number |
| Resolution | Refund/Exchange | Repair, Replace, Refund, or paid options |
| Shipping | May be customer-paid | Often merchant-paid (configurable per return reason) |
Warranty Lifecycle Stages
Claim Submission
Customer submits a warranty claim with:
- Product details and serial number (if serial tracking is enabled)
- Description of the issue
- Photos/videos of the defect
Eligibility Check
ReturnMate matches the product against your warranty policies to check the item is within its warranty period. Staff review the claim details before approving.
Approval & Return Label
Approve the claim (Approve RMA) and issue a return shipping label, or reject it with a reason.
Receive & Verify
Mark the item as received when it arrives. If the customer provided a serial number, verify it against the physical unit in the Mark as Received modal.
Diagnostics & Determination
Run diagnostics, assign fault codes, and select a determination:
- Warranty Approved — valid manufacturing defect covered under warranty
- Out of Warranty — outside the warranty period or not covered
- Customer Damage — damage caused by misuse or accident
- No Fault Found — no defect found during inspection
Resolution
Choose from the resolution options enabled for that determination — repair, replacement, refund, or paid options (which require a paid quote). Complete the work and return the item or ship the replacement.
Creating Warranty Claims
Customer Portal
Customers submit warranty claims through your returns portal like any other return:
- Customer selects their order and items
- Chooses a warranty-type return reason (configured in Settings → Return Reasons)
- Describes the fault and uploads photos/videos
- Enters the serial number if serial tracking requires it
- Submits for review
Out-of-warranty return reasons can be configured to appear only when the product is outside its warranty period, routing those customers into the paid-repair flow automatically.
Staff-Created Claims
Staff create warranty claims from the Create Return page by selecting the customer's Shopify order and a warranty return reason — see Staff-Created Returns. For items bought from a third-party reseller (no Shopify order), use the Third Party Repair return type — see Third-Party Repair & Quotes.
Statuses on a Warranty RMA
A warranty RMA carries two kinds of status:
Core RMA status
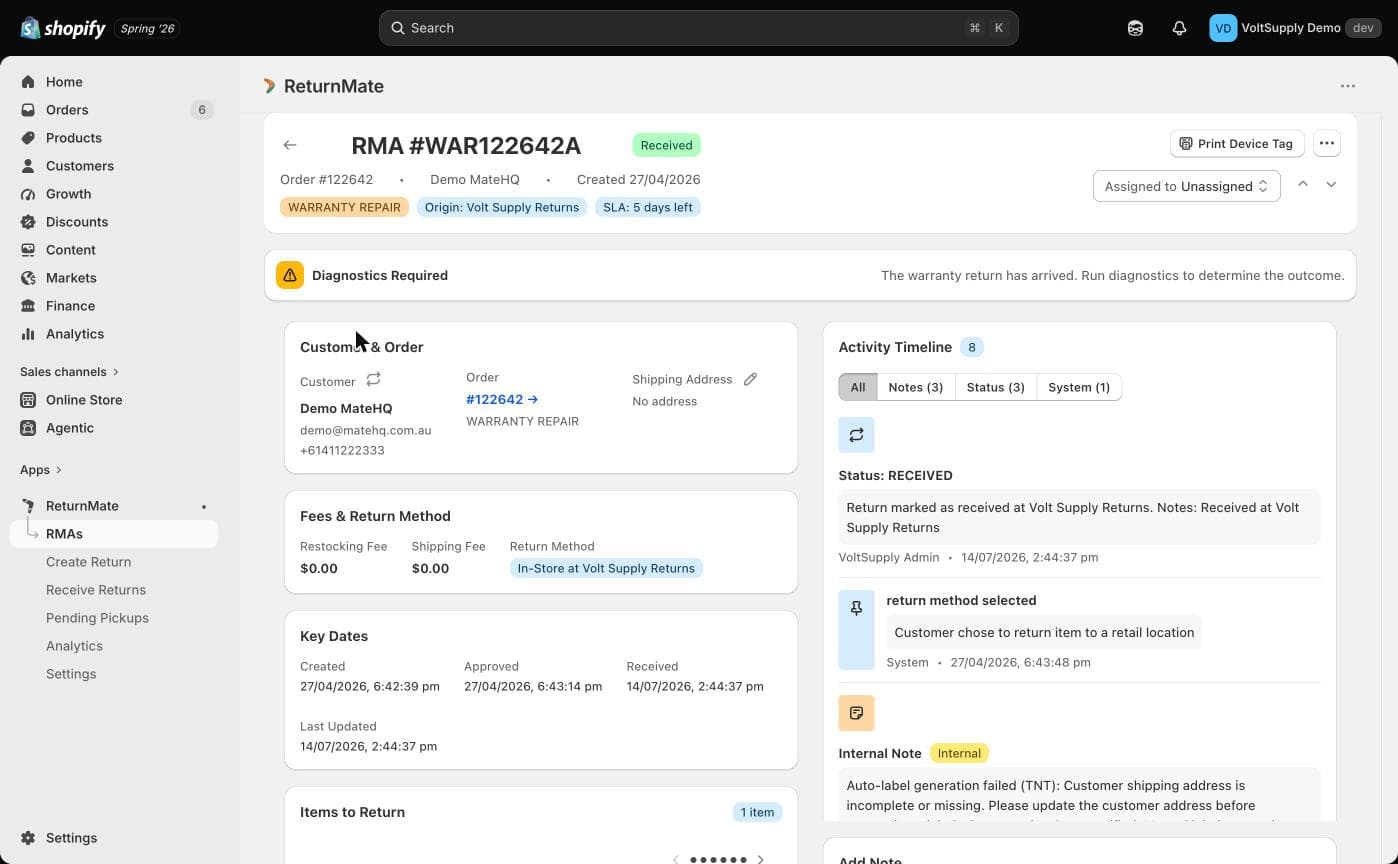
The standard RMA pipeline — Submitted, Approved, Label Issued, In Transit, Received, Inspected, Resolved, Rejected, and so on — plus quote statuses (Quote Sent, Quote Paid, Quote Declined) when a repair quote is in play. The banner at the top of the RMA shows the current stage and suggests the next action (for example, "The warranty return has arrived. Run diagnostics to determine the outcome.").
Warranty RMA statuses (configurable per shop)
On top of the core pipeline, you can define your own repair-job statuses under Settings → Warranty Settings → Warranty RMA Statuses — for example Technician Assigned, Diagnostics, Waiting Parts, Being Repaired. Each status has:
| Field | Purpose |
|---|---|
| Status Name | Display name shown on the RMA |
| Code (optional) | Short badge code |
| Color | Badge colour |
| Default Status | Applied automatically to new warranty RMAs |
| Final Status | Marks the repair job as complete |
| Pauses SLA countdown | Stops the SLA clock while in this status (e.g. waiting on the customer or parts) |
Staff update the warranty status from the Add Note form on the RMA, so every status change lands on the Activity Timeline alongside the note that explains it.
Because warranty statuses are configured per shop, the exact status names you see depend on your setup. Some features look up statuses by name — for example, sending a quote sets a status named "Quote Sent" if you have one defined.
Eligibility Verification
- Warranty period — ReturnMate evaluates your warranty policies (matched by SKU, tag, or collection, in priority order) to determine the applicable warranty period per product.
- Serial numbers — captured in the portal and verified at receiving; mismatches are flagged. See Serial Number Capture.
- Repeat returns — when staff capture a serial that has been returned before, ReturnMate warns with the earlier RMA number so you can review the history.
High-value products, complex failure descriptions and borderline warranty periods still warrant human review before approval.
Tracking Warranty Performance
Fault codes assigned during diagnostics feed the product failure analysis in Analytics → Products, where product families are classified green/amber/red against the failure-rate thresholds set in Warranty Settings. Labour minutes and repair parts logged on RMAs give you real repair cost data per case.
Best Practices
- Define warranty policies for every product line so eligibility checks are automatic
- Enable serial capture for warranty case types
- Create warranty statuses that mirror your actual repair workflow
- Assign fault codes on every claim — they power supplier and product analytics
- Communicate proactively with customers at each stage